
An ollie has a reputation for being a simple trick, but that is far from the truth. Learning an ollie takes weeks and even months of practice and is exceptionally difficult to do. Skateboarding isn’t easy.
Keep this in mind as you practice and don’t expect to progress too fast.
Anyway, let’s get started.
Preparing To Ollie
The ollie is a complex set of motions that must be put together in a smooth sequence. There are a few moving parts so it helps to initially practice each motion isolated first. This was you can start to build some muscle memory that will help you put together the motions more quickly.
You will need to train muscle memory as you cannot focus on more than one part of your body at a time. And the ollie requires your entire body to move. This can cause frustration with people who know the proper form but can’t yet get their bodies to do it.
They need to isolate a certain body part and lock down the muscle memory for each part.
Practice Sliding Your Foot Up Your Board
This is one of the most critical parts of the ollie. You need to slide your foot up and forward at an angle. This will catch your board and level it out while in the air.
You can practice this by standing on the tail of the board and simply sliding up your foot. Start at about the middle of your board, turn your foot so the side is touching the grip tape and slide it up towards the nose of the board.
ACTION STEP: Practice sliding your foot up your board in sets of 20. Start your skate session by doing this exercise and periodically do this throughout your skate session.
Practice Your Pop
Another critical piece of the ollie is the pop. Popping your board refers to flicking your back foot down with your ankle. This will cause your back tail to “pop” against the ground which will cause the front of the board to shoot upwards.
The faster and harder your ankle’s flick, the nice pop you will get, and the easier it will be to catch your board with your front foot. It is worth noting that you pop as you jump upwards so that you are already in the air when your back tail makes contact with the ground.
To practice, simply position yourself on your skateboard and shift your weight down onto your back foot so that your tail makes contact with the ground. Don’t jump yet, this is just to start to help you get used to the motion.
ACTION STEP: Practice putting your tail to the ground in one quick motion in sets of 20. Start your skate session by doing this exercise.
If you think skateboarding is hard, you’re right. Check out why skateboarding is the hardest hobby and why the learning curve is so steep.
How To Ollie
Putting it all together is where things get tricky. I’m going to go over each part in order, but some of these parts happen near simultaneously as you do an ollie.
Push Off
Start by pushing off so that you are moving slowly forward. You don’t want to learn ollies while completely stationary because then you will have to relearn them while moving.
Start with a very slow speed. You should be going fast enough that you won’t suddenly stop or get caught on a small crack, but slow enough that you aren’t so scared to try the ollie.
Position Your Feet
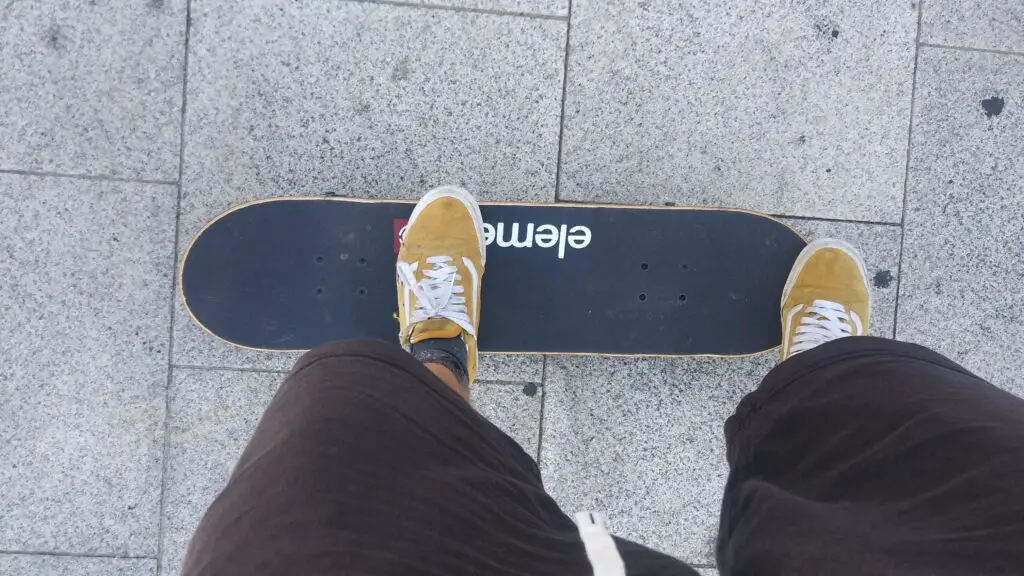
Once you are moving, set your feet in position to do an ollie.
Your front foot should be centered perpendicular to the board and positioned right behind the front bolts. The ball of your back foot should be centered on the back tail.
Your weight should be evenly distributed between both feet before you pop your board.
Crouch Down
Bend your knees, but keep your chest up. Looking down at your board is a bad habit so only do it if you really have no idea what your legs and feet are doing.
Crouching will help you get ready to explosively pop up.
Pop Your Board
This is where things get hard.
Popping your board should be done by snapping your ankle down as you jump up and off of the board. Your feet should no longer be touching the board when your back tail makes contact with the ground. It is incredibly common for beginners to stand on the back tail as it hits the ground and ruin their pop.
To reiterate, pop comes from snapping your ankle down and not shifting your weight to your back foot. This will take practice to learn to jump up and snap your ankle at the same time. Be patient with yourself.
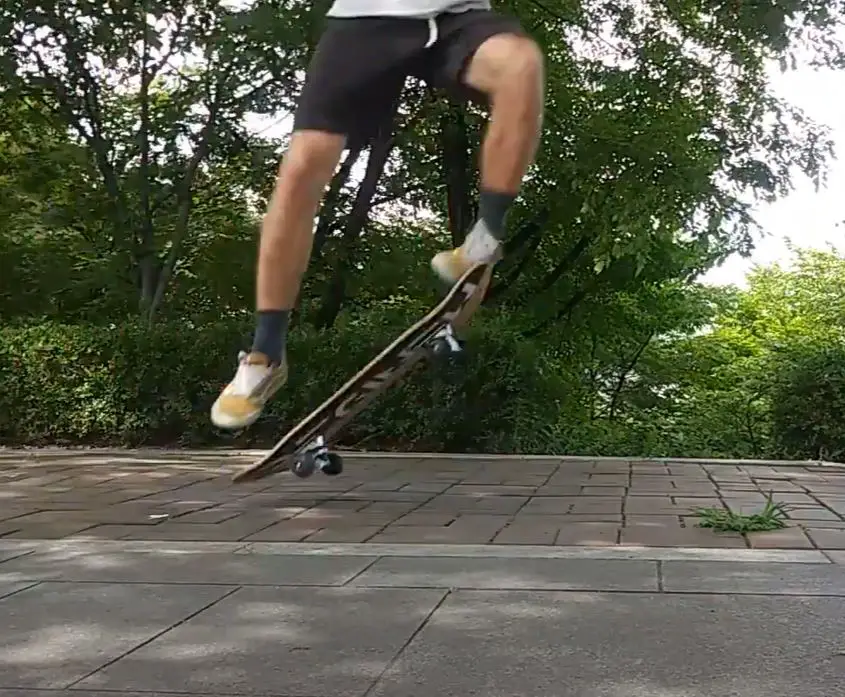
Slide Your Front Foot Up and Forward to Catch Your Board
Starting as you jump and pop your board, but also continuing after is the foot slide. This is critical to actually getting any air with your ollie.
Your ankle needs to turn so the side of your foot makes contact with the board. Then you need to slide that turned foot up and forward. Sliding up will bring your board up and give you air. Sliding the foot forward will level out your board.
Putting this together with the pop will be hard and take many skate sessions to do well. I suggest videoing yourself so you can pinpoint exactly what you are doing wrong.
The most common mistake here is that beginners don’t turn the front foot and the side of the foot never touches the board itself.
Level Your Board Out
As your front foot slides up and then forward, your board will be pushed up. The tail of the board will start to rise up particularly when you push your front foot forward.
When the back of the board rises up, you will catch the board with your back foot. The upward rising momentum the board has from the ollie will keep the board on your feet as you come back down to the ground.
Catching the board is simple and mostly happens naturally. All you need to do is make sure your shoulders are level as you ollie so that you can catch the board evenly.
Land Your Ollie
At this point, all you need to do is fall back down.
Bend your knees a bit when you make impact to have a more natural and less stiff look. You should try to come down evenly, but if you are off-balance then land with the back wheels slightly first. If you land with the front wheels first, it will be harder to ride away.
What shoes are you skating? Have you ever tried skating Vans? Learn whether or not Vans shoes are actually good for skating or just a marketing ploy.
How Long Does It Take to Learn An Ollie?
An ollie is a brutally complex trick that most people think is simple. Unfortunately, it really isn’t and it takes much longer to learn than you might think.
Learning to Ollie takes most skaters at least a month. 45% of skaters took 3 or more months to learn an ollie and 68% took at least a month to learn how to ollie. The ollie is actually a very complicated maneuver that takes practice and persistence to master. Most skaters will take many more months before their early ollie is clean and high.
Most people don’t understand how difficult skateboarding is and how long it takes to become decent at it. This causes a lot of people to start and stop the sport. The trick is to try and enjoy the little things while you are progressing. Even if you can’t ollie, there are plenty of other tricks that you can learn.
I got my data from online polls conducted on forums and you can see more about this in my article.
Additional Resources
I have other guides about doing an ollie meant to specifically answer different aspects that might be helpful for you. You can see my list of ollie articles below:
- How Long Does It Take to Learn to Ollie With Data
- How to Ollie While Moving- A Visual Guide
- How to Ollie While Moving Common Problems and Solutions
- How to Ollie and Skate a Curb- A Visual Guide
- How to Stop Turning While Doing an Ollie- A Visual Guide
Otherwise, learning how to ollie takes a lot of time and dedication. It can also help to get other perspectives and see other guides so you can get a really solid understanding of how the ollie works. You can also learn different tips and potentially find one that really helps things “click” for you.
Below are a few guides that I used when learning my ollie, and they are amazing. I wouldn’t be the skater I am today without Youtube and people on the internet explaining how to skate.
Braille’s How to Ollie
Braille has taken over the skateboarding guides industry. They are teaching a whole generation through Youtube and their online course Skating Made Simple.
Personally, I’ve never tried skating made simple, but they make great tutorial videos on Youtube. Also, Aaron Kyro is ok too I guess.
Sarah Park-Matott’s Ollie Guide
This ollie guide is great because it was made by someone who is a beginner themselves. She isn’t a professional trying to teach someone who’s never touched a board before so she is a bit more relatable.
She also goes over what worked for her and talks about reasonable expectations while learning an ollie. Plus she has a very calm and likable attitude.
Conclusion
So there it is.
Doing an ollie is not an easy trick to learn and it will take a lot of time and practice. Don’t get discouraged. Try and isolate the different parts of the trick and then video yourself as you put it all together. That video will help you identify any mistakes that you are making.
There are a lot of resources out there to help you as well as supportive online communities if you are skating alone. I recommend joining at least one skating online group and watching a few resources of how to ollie guides. The more input you get, the better.
Hopefully, this guide helped you break it down and understand the parts of an ollie. Personally, I prefer the gif-based tutorials so I don’t have to keep rewinding a video.
Anyway, thanks for reading, and look out for more content from Board and Wheels.
Sources
I have other guides about doing an ollie meant to specifically answer different aspects that might be helpful for you. You can see my list of ollie articles below:
- How Long Does It Take to Learn to Ollie With Data
- How to Ollie While Moving- A Visual Guide
- How to Ollie While Moving Common Problems and Solutions
- How to Ollie and Skate a Curb- A Visual Guide
- How to Stop Turning While Doing an Ollie- A Visual Guide
- How to Time Your Ollie
- How to Ollie Over an Obstacle
Otherwise, learning how to ollie takes a lot of time and dedication. It can also help to get other perspectives and see other guides so you can get a really solid understanding of how the ollie works. You can also learn different tips and potentially find one that really helps things “click” for you.
Below are some great guides that I think are strong in different aspects. Check them out:
