

Everyone wants a better ollie and with good reason.
However, learning to ollie takes 45% of new skaters 3 months or more. Then getting a good controlled and high ollie will take months more of practice. So be patient and it will come.
Everyone wants a higher and better ollie and there are some tricks and things to keep in mind to help you out.
Let’s get into it.
How to Ollie Higher
Position Your Front Foot Towards the Middle of the Board
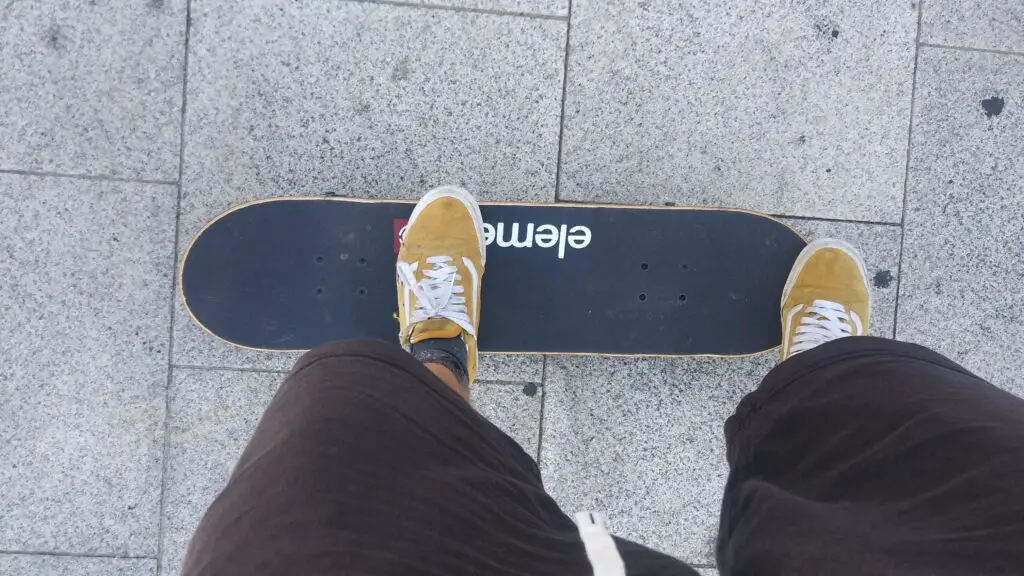
Foot position matters when it comes to ollies.
How high you raise your board up in part depends on how much you slide your foot up. So it makes sense that if you have more griptape space to slide your foot up, then you will be able to raise your board higher. And this is actually the case.
So, to do this is very simple actually. Just start your ollie with your front foot closer to the middle of your skateboard and further from the nose of your board. It might feel awkward to ollie like this at first because you will be forced to slide your foot more. Don’t worry because you will get used to it.
Whenever I need to get some extra height for an ollie, I always slightly shift my front foot back.
ACTION STEP: Practice doing ollies with your front foot back for the next few sessions. Try and do at least 50 ollies in this way. This is an important skill to learn.
Crouch Down and Explode Up
You need to explode up to get the highest ollie that you can do and you can’t jump up with straight legs.
So to start, crouch down so that you at least have the potential to jump up in an explosive way. If you aren’t healthy and can’t jump more than 1-inch, then you’re ollies won’t be very high. So getting your health in order so that you can actually crouch and jump is key.
Practice crouching down on your board and popping your ollie from the crouched position. Can you notice yourself jumping a bit higher?
ACTION STEP: Practice ollies from a lower crouched position than you usually do. Do this for at least 20 ollies for each session. Start to be more aware of how crouched you are before each ollie.
Crisply Pop Your Tail
To catch your board properly and be able to raise it up, you need to have a good, crisp pop.
When I say “crisp” what do I mean?
I mean that you have a strong downward flick of your ankle as you jump up off of your board. This flick will send your skateboard’s tail toward the ground and it will “pop” against the ground with a crisp sound. You don’t muffle this sound and stop your pop by standing on your tail as it touches the ground.
Getting a good pop is critical to your ollie so you need to practice flicking your ankle down. Be aware of how you flick your ankle down and whether you’re still standing on your board as the back tail touches the ground.
ACTION STEP: Video yourself doing your ollie. Does your ankle flick down? Do you jump from your board before the board’s tail touches the ground? If not, practice the next 20 ollies while being conscious of how you’re flicking your board when you jump.
Keep Your Shoulders Flat and Level
Keeping your shoulders controlled while skating determines your board control. I cannot state enough how much of skateboarding is in your shoulders.
These days whenever my ollie does go as high, it is usually because I lean back with my shoulders which causes my front foot to not catch the board as it should. Sometimes I do this instinctively when moving very fast. My body unconsciously wants to lean back to protect itself.
However, stable and unmoving shoulders help me keep proper form and pop my ollies are high as I have the potential for. I can also use my front shoulder to choose the direction of my ollie as I come down.
It is common for beginners to lean back while they try their ollie. This is often unconscious and is just the body naturally trying to protect itself against an unknown. The unknown being the little board on wheels underneath you.
ACTION STEP: Video yourself as you do your ollie. This time watch your shoulders. Ignore your arms. Do your shoulders turn or lean front or back? They should be parallel with the ground at all times. If not, focus on your shoulders as you practice your next 20 ollies.
Mistakes That Keep Your Ollie Low
Standing On the Tail of Your Board
One very common mistake that beginners make that kills their pop is to not pop their board properly.
A proper pop should involve the ankle flicking down and the back foot coming off of the board before it makes contact with the ground. Many beginners don’t use their ankle, but simply shift their weight and jump off of the ground. The result is that their foot holds the tail against the ground and kills any potential pop.
Remember pop is the tail of your board hitting and bouncing off of the ground. It cannot bounce up if your foot is holding it down.
This is probably the number one killer when it comes to getting good ollies. With no or little pop, the rest of the ollie falls apart and you will at best just push your board slightly off the ground. Remedy this by practicing your pop and jumping from the board itself before the tail hits the ground.
Not Turning Your Front Foot
This is another problem that can be hard to identify because you can sometimes still bring your board off the ground without actually turning your front foot to slide it up.
You can see loads of beginner videos where they are incredibly stiff as they try and ollie and often their front foot simply doesn’t turn. You must get this motion down to get high and controlled ollies. Otherwise, you will not properly catch and lift your skateboard.
You can practice this motion while stationary and without popping first to build up your muscle memory. This will make things easier. To do so, simply stand on your back tail and repeatedly turn and slide your front foot up your board.
Also, note that you will begin to turn your foot right as you start your pop. So you will begin to turn your foot before the tail of your board hits the ground. You can see this in the slow-motion gif of my ollie.
Not Jumping Up and Bringing Up Your Legs
Among the notorious beginner videos of bad ollies, you often see people who simply aren’t jumping. They are getting absolutely no air off the ground and they don’t bring their legs up by using their core and bending their knees.
Simply put, you can only ollie as high as you can jump. If you have a 1-inch vertical then sorry bud. You can increase your ollie height by bending your knees and lifting your legs, but your ollies will never be very high.
So how do we remedy this?
There are two things we can do to help this problem:
- Stretching and Practicing Lifting Your Legs as You Jump
- Exercising to Improve Your Jump
The easiest and quickest change is to start by stretching well so that you are limber. Then practice jumping and bringing your knees up towards your chest. If you can’t bring your knees up in this fashion then you need to stretch and practice each day until you can.
Skateboarding is a sport. If you want to skate well, then you need to be in good shape.
The next thing you can do other than practicing bringing up your legs is to exercise and strengthen your calves and quads. These muscles help you jump explosively and building these muscles will allow you to jump higher. At the gym or at home, start doing squats and calf raises twice a week.
If you want to read about a more thorough workout plan to help your skateboarding, check out my complete guide here.
Additional Reseources
I have other guides about doing an ollie meant to specifically answer different aspects that might be helpful for you. You can see my list of ollie articles below:
- How to Ollie: The Complete Guide for Beginners
- How Long Does It Take to Learn to Ollie With Data
- How to Ollie While Moving- A Visual Guide
- How to Ollie While Moving Common Problems and Solutions
- How to Ollie and Skate a Curb- A Visual Guide
- How to Stop Turning While Doing an Ollie- A Visual Guide
Otherwise, learning how to ollie takes a lot of time and dedication. It can also help to get other perspectives and see other guides so you can get a really solid understanding of how the ollie works. You can also learn different tips and potentially find one that really helps things “click” for you.
There are also other guides out there that can help you. I always encourage people to view many different guides just in case one “clicks” for you. Below is a link to a guide by Jonny Giger which is really good and instructive.
Give it a watch.
Conclusion
So there it is.
Doing a higher ollie is mostly about form more than anything. It means eliminating any less than ideal habits you’ve developed to maximize your height potential. Considering you’ve already built up muscle memory, this will take some time to do, but oh is it worth it.
You can also take these tips and use it to control your ollie height depending on how high you need to ollie. If you only need to get up a curb, a smaller ollie with little crouch and normal foot positioning is perfect.
If you need to jump something bigger, then shift your front foot back and crouch down so you can explosively jump up.
Anyway, thanks for reading, and look out for more articles from Board and Wheels.
