

At some point, you are going to want to invest in a custom board and move away from buying completes. If it is finally time for you to put griptape on your board for the first time, then this guide is for you.
Please note that I will be using clear griptape in the visuals for this article, but most griptapes are black in color. This doesn’t affect how you apply the griptape whatsoever.
Let’s go over putting griptape on your board so you don’t accidentally make a simple mistake.
Items Needed
- Griptape
- A Skateboard Deck (with no applied griptape)
- Car Keys or a Wrench
- A Box Cutter or a Razer
Putting Griptape on Your Board
Choose a Griptape

Not all griptapes are made the same, but most of them are. Certain brands like Mobb Grip have grippier griptapes, but it’s difficult to wrong here. You can see some basic reviews of different griptapes here.
You need to purchase griptape before you can put it on your board. Order some online or pick it up from your local skate shop. Griptape is one size fits all so don’t worry about that at all.
Put Your Board on a Flat Clean Surface

You want to have your board laid out on a surface that is clean from any debris that might accidently stick to your griptape. You also want your surface to be flat so you can easily apply the griptape itself. Great surface for this might be a garage floor, a coffee table, a dining table, or a workbench.
Remove Any Existing Griptape
If your board already has griptape, then you will need to remove it before you apply any new griptape. To do so, you will need to heat up the adhesive of the griptape with a hair dryer and slowly peel the griptape back. This is somehing you want to go slowly with and do carefully. If you accidentally rip the griptape, removing it cleanly suddenly becomes much more difficult.
Line Up Your New Griptape with Your Board
Before you actually put your new griptape on your board, you will want to try and line it up with the board itself. This is so you don’t accidentally apply the griptape crooked or leave one end not fully covered. So just unroll and lay your new griptape on your board as if you were going to apply it. This will give you a good sense of how to lay your griptape once you remove the backing paper.
Peel Off the Backing Paper
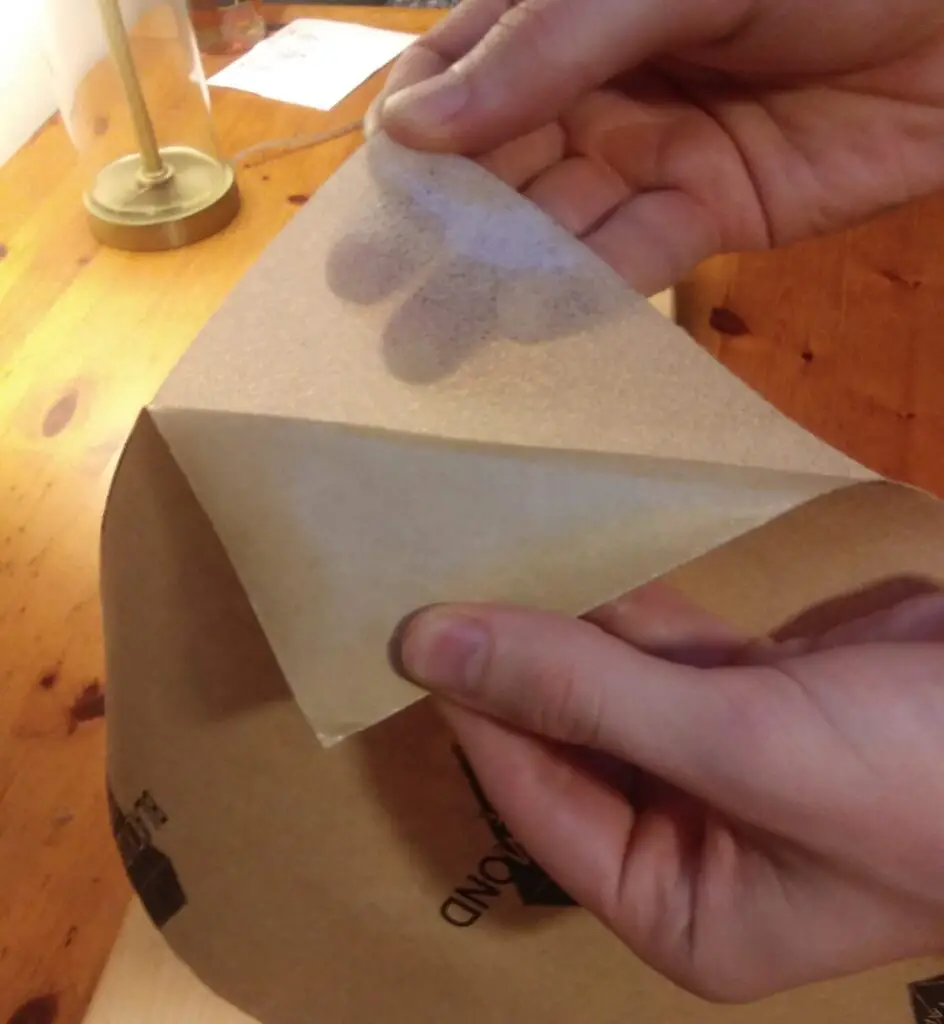
Once your board is lying on a flat surface and clean, you are ready to peel off the back paper of your new griptape and expose the adhesive. The backing paper is simply the thin paper layer meant to cover the adhesive until the griptape is ready to be applied. It is basically like peeling the back of a large sticker. Once you peel the backing paper off, be careful not to let the griptape roll on itself again. This will cause the griptape to stick to itself.
Who is Jamie Foy? Where did he come from and why is he everywhere now? Check out my way too detailed guide on Jamie Foy.
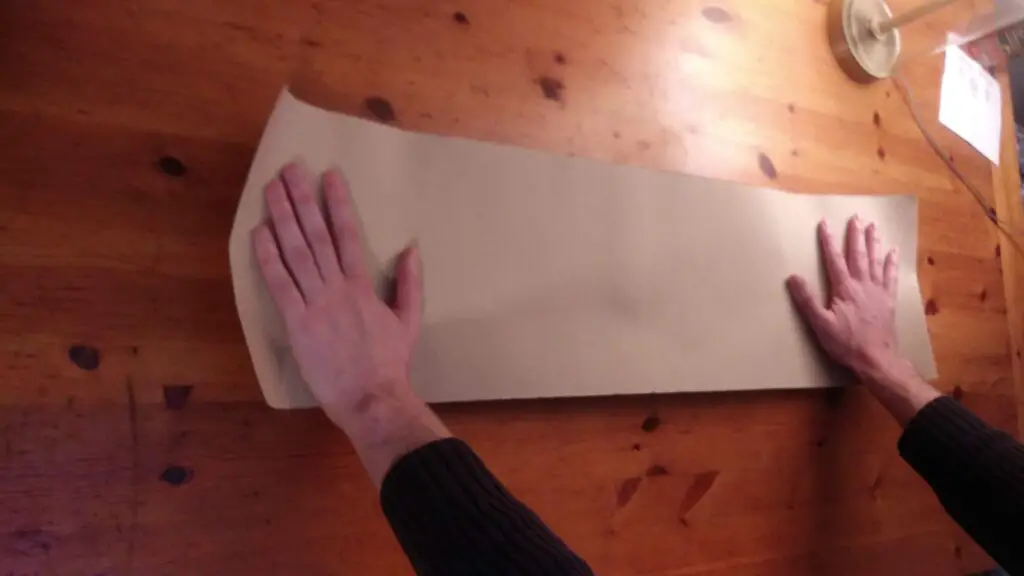
Lay the Griptape on Your Board
Once the adhesive is exposed, you can apply the griptape to your skateboard. Do this by starting on one end of the skateboard and laying down the griptape slowly by pushing it down with your hand. Keep some tension in the griptape as you lay it down to avoid making too many air bubbles. Once the griptape is applied, give it an extra pat down to make sure it adheres to the board.
Pop or Smooth Out Any Air Bubbles
Check your board to see if you accidentally made any air bubbles or places where the griptape is not lying flat. If you find any air bubbles, try first to push them down with your finger. If you can’t push them down, use a box cutter or razer to poke a hole in the air bubble and then try to push it down again.
Scrape the Sides of Your Board
You should now have a skateboard that has a large sheet of griptape covering it. In fact, the is way too much griptape covering your board and you need to trim some away. The way you need to prepare to trim away the excess griptape, is to scrape the sides of your board. You can do this with a wrench, keys, a kitchen utensil, or pretty much anything metal. Scrape along the edges of your board until the griptape is bent and white on the edge.
Cut Away the Excess Griptape
Once you have scraped the edge of your board, you can now cut away the excess griptape. To do this you will need a box cutter, a razer, or a very sharp knife. Make an initial incision from the out edge of the griptape to the edge of your board. Then cut along the edge of your board with your box cutter or razer. The griptape where you scraped should easily be cut and allow you to quickly cut along the entire outer edge of your skateboard. Go slowly here so you don’t have to clean up your edges later.
Poke Holes For Your Deck Screws
If your board doesn’t yet, have trucks put on it, then you will need to poke holes for your deck screws. To do this, simply use a pen or a screwdriver and poke holes through the griptape itself. These holes don’t need to be perfect, just large enough so that your deck screw can push through.
If you’re a solo skater or just started and have no one to skate with yet, check out my best tips to make the most out of solo skating.
Conclusion
So that’s it.
Putting on grip tape isn’t so hard to do, but you need to learn how for your first time. The only thing you can really mess up is accidentally putting in a bunch of air bubbles. Otherwise, it’s hard to go too wrong.
In this article, I made the gifs using clear grip tape which is something I’ve never tried before. I did this because I wanted to try out the clear grip tape and maybe make a review here later on. So look out for that.
Anyway, thanks for reading, and look out for more content from Board and Wheels.
